

Raspberry Pi NMEA Multiplexer
Warning!
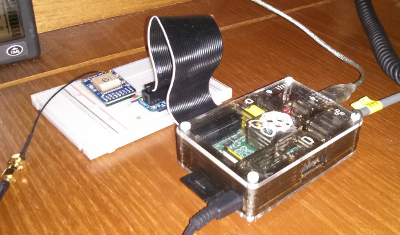
This page is based on an early (2015/Debian 7/Wheezy) version of Raspbian on a Raspberry pi 1 model B and may not be applicable to modern hardware or Raspberry pi OS.
This page describes how to use a Raspberry Pi and kplex to act as a multiplexer and network server for data in the NMEA-0183 format. This involves converting between one or more serial line feeds (e.g. from your GPS, AIS or other nav instruments) and an IP (Internet protocol) network. Use of the pi is described but obviously you can generalise this to any computer running Linux, OS X, FreeBSD or probably any POSIX-like OS.
A note on Terminology
Transporting NMEA-0183 over a computer network is often referred to as "NMEA over Ethernet". This is slightly misleading as "Ethernet", although usually involved, doesn't need to be. There is nothing special in this context, either to the programmer or the user, about ethernet. NMEA data you receive from Internet AIS feeds will frequently travel part of the way to you over other media. The common technology that is being used in the transport of the data here is Internet Protocol, so "NMEA over IP" would be a more accurate description of what we are doing here.Disclaimer
The last of the wine from last year's trip to Cherbourg was consumed in the writing of this tutorial. Please alert me to the inevitable errors.
Assumptions
For this tutorial we assume that you have an existing boat network. This may be wired or wireless but for the sake of simplicity we'll assume you are plugging your pi into an ethernet port on your router. The techniques here should work just the same if you connect your pi to a wireless network.
If you don't already have a network, take a look at the tutorial on building a wireless access point.
Materials
You will need..
- Raspberry pi Model B. The A can be used but would require an additional USB hub. We assume you have added an SD card and installed Raspbian. There are many tutorials on the web as to how to do this
- The most recent version of kplex, installed according to the instructions.
- 12v power supply with micro USB connector. You can use a car phone charger pluged into a boat's cigarette lighter power socket or there are cheap 12v to 5v power converters on ebay.
- Ethernet cable (or wireless dongle if that is your preferred network connection method)
- Method of connecting your NMEA device (discussed below)
Connecting Your Device
There are a number of ways you can get NMEA data into the pi. The easiest is if your device outputs NMEA-0183 data over USB. Simply plug the USB into the pi. Some devices have a 9 pin RS 232 serial connector. If that's the case, your simplest option is to purchase a serial to USB converter. If you have multiple devices to connect, dual and quad port serial to usb adaptors are available. Plug your serial connection into the converter and the converter's USB end into the pi.
If your device just has bare wires, your options depend on what those wires are. Devices following the data transmission standard set out in the first NMEA-0183 specification may have single wires labeled "Rx" (receive) and "Tx" (transmit). There will also be an electrical ground wire. The device sends and receives signals via changes in the potential of a signal wire with respect to ground. Whether it reads an incoming bit of information as a "1" or a "0" depends on the voltage of the "rx" wire relative to ground. With equipment such as this you can wire it to a female DB9 (PC serial) connector which you then connect to the pi via a serial to USB converter, or you can make use of the pi's console port (see below). If wiring a DB9 connector, connect the device ground ("GND") to pin 5 (ground), Tx to pin 2 ("RxD"), Rx to pin 3 ("TxD"). DB9 connectors are available from anywhere that sells electrics professional or hobby electronic supplies and will probably need soldering. Be especially careful to consider which side of the connector you are looking at when working from diagrams as it is easy to be confused between male/female front/back views.
If the device has wires labeled "NMEA OUT +" and "NMEA OUT -" (and possibly "NMEA IN +" and "NMEA IN -", the device treats signal voltages as relative to the "+" and "-" lines and will be using RS 422 as specified by more recent versions of the NMEA-0183 standards. "Differential" transmission as this is known is less subject to interference over longer wire runs. The most "correct" way to connect such devices to the pi is via an opto-isolated RS 422 connection. It is possible to buy opto-isolated RS422 to USB converters but these tend to be expensive (€80 or more). Non-opto-isolated RS422 to usb converters can obtained far more cheaply if you wish to take the small risk of a direct electrical connection between devices.
It is usually also possible to use an RS232 converter. Many people do this because RS232 to USB converters are cheaper than RS422 to USB converters and more readily available. To connect RS422 output from a device to RS232 input, connect "NMEA OUT +" on the RS422 device to "RxD" on the RS 232 input and connect ground and ground together. This usually (but not always) works because although the amplitude of the signal on the NMEA OUT + line will be half as great relative to ground as it would be relative to "NMEA OUT -", it is still big enough to be recognised by many RS232 receivers. There are, however, no guarantees.
Using the UART
The pi has a usable onboard UART which is by default designated for use as a console port. The device in the file system associated with this device is /dev/ttyAMA0. There are a number of articles on the web describing how to connect an RS232 device to this UART. A popular method uses a MAX3232 IC and 5 capacitors to convert RS232 to the 3.3v line level signals expected by the pi.
It should also be possible to use an RS422 transceiver and opto isolation, but my enthusiasm for electronics has not stretched sufficiently far to try this.
If you are going to use /dev/ttyAMA0 for serial device input`you need to:
- Remove the reference to it as console device in /etc/cmd.txt
- Disable the terminal process assigned to monitor that device for logins
Connecting Multiple Devices
kplex is a multiplexer so you can connect several NMEA-0183 devices to your pi and mix and match the way you connect them. If you have several several USB connections you may run into a problem where when the pi reboots your USB devices in the file system map to a different physical USB device. "Pinning" logical to physical device mappings is beyond the scope of this document, but if such problems are encountered, the user is encouraged to investigate udev configuration.
Device Permissions
Both the console port (/dev/ttyAMA0) and USB serial devices are not, by default, readable by everybody. If you plan on running kplex as root this is not an issue. If you wish to run kplex as a non-root user, make sure the user is in the "dialout" group. To add user "fred" to the dialout group, edit the /etc/group file and append "fred" to the comma separated list of users in that group. For example, change:
dialout:x:20:to
dialout:x:20:fredfred will be be able to access devices which are readable by group "dialout" after logging in subsequent to this change.
Basic kplex configuration
The kplex configuration page contains information on all the things you can do with kplex. There is a lot of information and it can appear quite complex for what is normally a very simple process.
The kplex configuration file
kplex.conf is divided into sections, one for each "interface" which kplex uses. An interface can either be an input, an output, or for some types of interface, both. Each interface is defined by the "type" of the interface inside square brackets followed by a number of name/value pairs, one pair per line, with name and value speparated by "=". If we have an AIS receiver connected via /dev/ttyUSB0 and a GPS device connected via /dev/ttyUSB1 and we only want to read data from each of them we might define the relevant interfaces thus:
[serial]
filename=/dev/ttyUSB0
baud=38400
direction=in
[serial]
filename=/dev/ttyUSB1
baud=4800
direction=in
The definition of one interface continues until the start of the next (ie until a line with an interface type enclosed in square brackets is encountered). The order of the property/value pairs is not important.
Of course two inputs and no outputs is not particularly interesting. In fact kplex will tell you that and not bother running if you try the above configuration, so let's tell kplex to distribute the information it receives to the network, firstly by creating a tcp server which clients can connect to, and secondly by sending broadcast udp packets. We need to append the following to our configuration file:
[tcp]
mode=server
direction=out
[broadcast]
direction=out
device=eth0
This tells kplex to create a tcp server listening on the default NMEA port (10110) on all network interfaces which outputs data only (it does not receive). It will also broadcast any data it receives out of the ethernet interface "eth0" (change this to "wlan0" to use the first wifi interface). It will use the interface's broadcast address and the default port of 10110. Different ports can be specified using the "port=" property for an interface.
Connecting to kplex
TCP Server
An application wanting to connect to the TCP server kplex creates will want to know an address and port to connect to. If you haven't specifically specified a port, kplex uses tcp port 10110. If you haven't specified an address, kplex will listen on all network interfaces of the system it is running on. Note that you cannot specify an arbitrary address: it must be one assigned to the computer kplex is running on. Unless you have a very specific requirement and know what you're doing, you shouldn't tell kplex which address to listen on.
So what address to connect to? If your network is manually configured and you have assigned an address to the pi yourself use the pi's network address. If your pi is in its default configuration and receiving an address from a DHCP server on your network you have some options.
Determine what the pi's address is and use that. You can determine the pi's address by logging on and running the ifconfig command. If you are connected to the network by the pi's ethernet interface:
ifconfig eth0
eth0      Link encap:Ethernet  HWaddr b8:27:eb:1c:5e:05
          inet addr:192.168.1.2  Bcast:192.168.1.255  Mask:255.255.255.0
          UP BROADCAST RUNNING MULTICAST  MTU:1500  Metric:1
          RX packets:14007 errors:0 dropped:0 overruns:0 frame:0
          TX packets:11267 errors:0 dropped:0 overruns:0 carrier:0
          collisions:0 txqueuelen:1000
          RX bytes:1737980 (1.6 MiB)  TX bytes:4468006 (4.2 MiB)
The first wireless interface (for those connected via wireless) is usually "wlan0".The address to connect to is the one after "inet addr:" in the example above, in this case 192.168.1.2.
Unfortunately the next time your pi or router reboots it may be given a different address. Logging on each time to find out the address is not very user friendly so we really need a method of giving the pi a fixed address.
The best way to do this if your DHCP server (normally implemented on a router) allows it is to tell the DHCP server to always assign a particular address to the pi. Most but not all domestic routers have this capability. Refer to your router's documentation to find out if this is possible. You will need to know the pi's hardware address, which the documentation may variously call "hardware address", "MAC address", "MAC" or "Ethernet address". This is shown in the ifconfig output and is specific to each interface, so "eth0" will have a different hardware address to "wlan0" (if you have a wlan0). In our output shown previously, hardware address is the 6 colon separated pairs of hexadecimal digits after "HWaddr". The IP address you tell the router to assign to that device must be valid for the network to which the pi is connected.
If you cannot get your DHCP server to assign the same address to your pi each time it boots you will have to assign an address manually to the pi. First determine the "DHCP range" which your DHCP server allocates dynamic addresses from (refer to your DHCP server's documentation). Choose an address which is valid on your network but outside the DHCP range and modify your /etc/network/interfaces to give the pi a static address, using your router as a gateway (there are many tutorials on this available). If you want to use symbolic addresses with kplex and other applications you will also need to modify the /etc/resolv.conf file to tell the pi's resolver where to find DNS servers.
UDP Broadcast
For broadcasts it doesn't matter if the system's IP address changes. If you're only going to be using broadcast you can have a different IP address every time and your clients won't care. All you need to know is your network's broadcast address. You can find this out from your router or any device connected to the network (refer to the documentation for the relevant device). In the ifconfig output on the pi above, the broadcast address is shown after "Bcast:". In the above example the network broadcast address is 192.168.1.255. As with the TCP server, kplex will default to using port 10110 if none is explicitly specified.
Getting things running
User to run kplex as
kplex needs to be able to read and write data to any files or devices it uses and if you want to use ports below 1024 you need to run as root. There should be no need to use a priviledged network port for kplex and you can ensure that kplex can read devices by changing permissions on them or adding the user kplex runs as to the appropriate group (as discussed above). To run kplex as root is not ideal security practice but is used for the sake of brevity in this tutorial.
Before proceeding any further, check that you have input. When invoked from the command line, kplex uses its configuration file and any other parameters you give it. Assuming we have constructed our kplex.conf as previously described with two serial inputs, a tcp server and a broadcast udp server, to run kplex (as root) and output to the terminal as well as the network:
sudo kplex file:direction=outIf you intend running kplex as a non-root user, run kplex as that user but for now let's assume you are taking the simple option. Run the command as above.
This would use your configuration file and in addition send output to the terminal, which is the default output for the "file" interface type. If you see all the NMEA sentences you expect scrolling down the screen then check to see whether you can connect other programs to kplex over the network. If all is ok we're nearly done. If sentences from one or both of your devices are missing, check physical connectivity and most importantly baud rate. AIS devices are invariably 38400 baud. Standard NMEA devices are normally 4800 (which is kplex's default for serial devices) but some GPS units are 9600 baud. If you have two USB connections at different baud rates, try swapping the device names round to ensure that you haven't mistakenly assumed which physical device is connected to /dev/ttyUSB0 etc.
When you are satisfied that everything is working correctly, stop kplex by holding down the "Ctrl" key and at the same time hitting the "c" key. Now we're ready to set things up for kplex to start at boot time.
Getting kplex to start at boot time
If you want kplex to be invoked as a non-root user, edit the start script /etc/init.d/kplex and change the variable "RUN_AS_USER" to the name of the user you wish to run kplex.
To have kplex start when the pi boots up, run the following:
update-rc.d kplex defaultsYou should now be able to start and stop kplex using the "service" command. To start kplex now (without rebooting):
service kplex startAnd if you wish to stop it:
service kplex stopIf in the future you want to undo things such that kplex no longer starts at boot, it can be achieved thus:
update-rc.d kplex removesee the man page for update-rc.d(8) for full details.
